
Classic Homemade Pie Crust
Here's everything you need to know about making a classic homemade pie crust. Get the best results every time with these simple ingredients and step-by-step instructions. It's a no-fail recipe with a flaky crust made with shortening, ready to bake for your sweet or savory pies.

As an Amazon Associate, I earn from qualifying purchases through links on Louisiana Woman Blog. Thanks!
There's something about pie that brings comfort to the mind, like this Paper Bag French Apple Pie, Baked In The Oven. It's the basis for a home-cooked meal or dessert that dates back to who knows when! If you've got a tasty, flaky pie crust, you've got potential for some good eatin'.
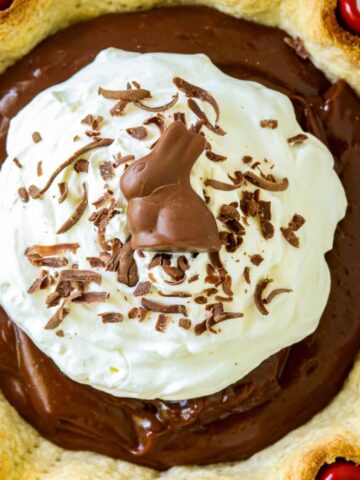
This Chocolate Bunny Pie features a milk chocolate filling made with leftover chocolate Easter bunnies. I store them in the freezer for year-round chocolate pie-making.
Different Pie Crust Recipes
As a fundraiser, I began making homemade pie crust for The 200 Chicken Pot Pie Dress recipe. Our daughter, Deidra, was in the Miss Arkansas beauty pageant, and we used the earnings from those pies to purchase a Tony Bowles gown. That was right before Tony's dresses started appearing on the red carpet. It'll take more than 200 chicken pot pie sales to gain one of those dresses today.
If you want to see the dress, go to the "200 Chicken Pot Pie Dress" post. It's stunning . . . that is, the girl in the dress is!
Why Make a Homemade Pie Crust Instead Of Buying a Store-Bought Brand?
Store-bought may be easier, but here are the benefits of making your own:
- fresh-tasting, flaky pie crust in no time
- convenient, make-ahead pie dough, ready and waiting in the refrigerator or freezer to roll out for baking and filling
- getting a pie crust to the thickness you desire, thick or thin
- knowing the ingredients in your pie, no preservatives, and as organic as you want
- satisfying results of making your own crust from scratch
I know that making your own pie dough can be intimidating at first, but it's easy once you get the hang of it! The rewards of rolling one out when there's a need for pie are gratifying. I call it pie-therapy.
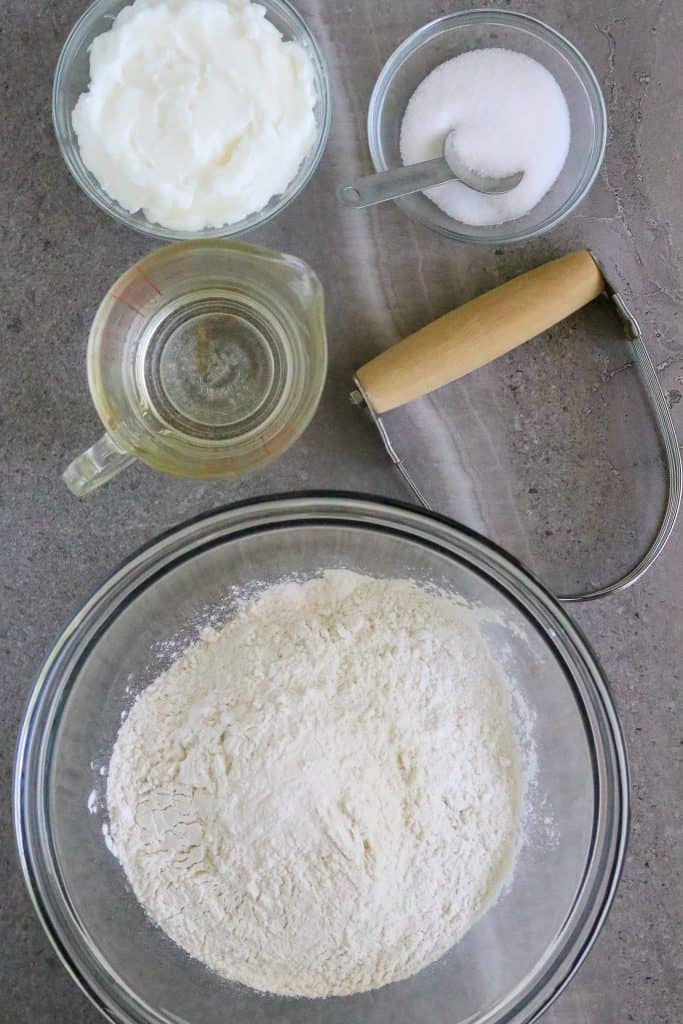
Ingredients For This Classic Homemade Pie Crust
Only four easy-to-remember items are needed, and three are kept in the pantry.
- all-purpose flour
- salt
- shortening
- ice-cold water
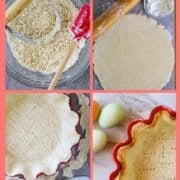
Step-By-Step Instructions
- Place flour and salt in a large bowl and stir together.
- Cut shortening into the flour using a fork or pastry blender cutter until the mixture forms pea-size balls.
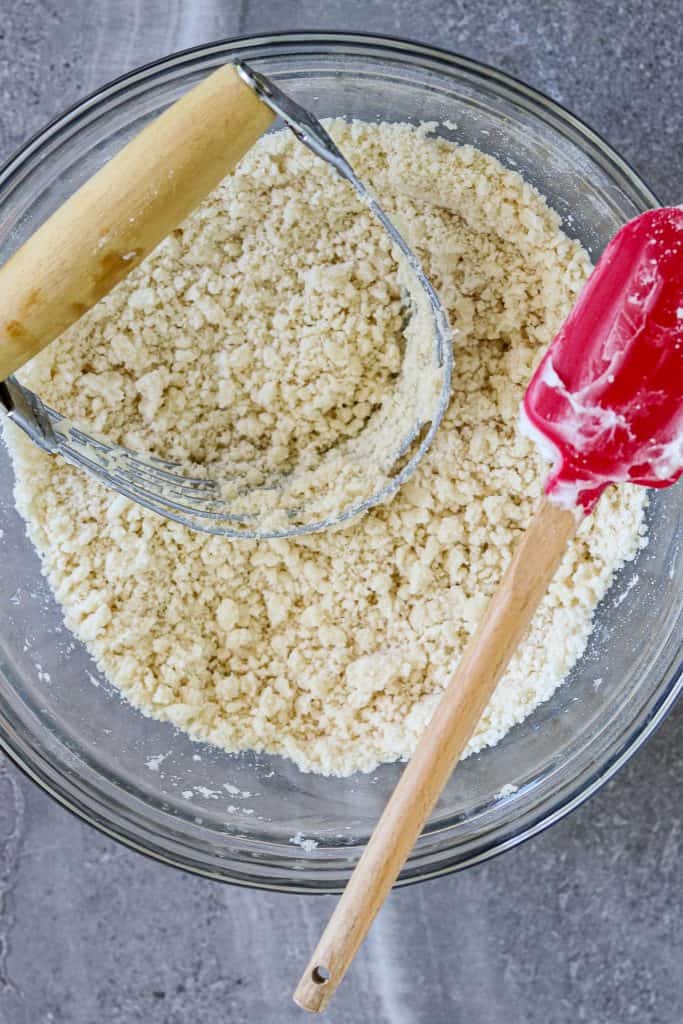
- Stir in small amounts of water with a fork until the dough comes together; you may use more or less than ⅓ cup. Sometimes the dough needs more water if the shortening isn't cut into the flour enough. Too much water makes a gummy pie crust. Too much flour toughens the dough. The key is to slowly stir in the water. When the dough forms into a ball, you can stop adding water.
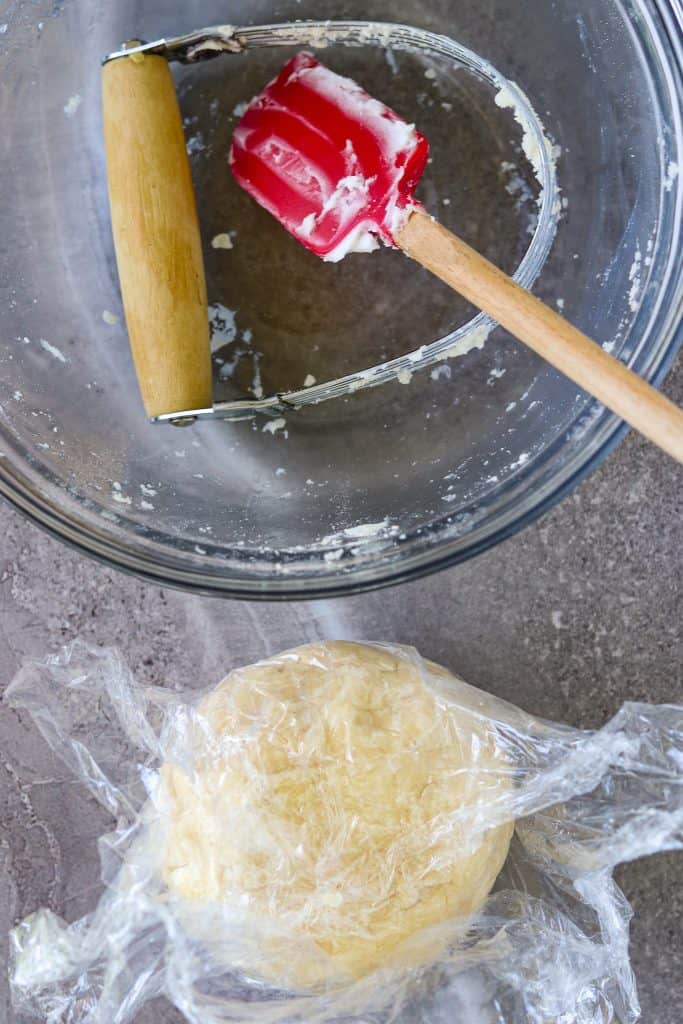
- Knead the dough a few times. Form it into a ball and place it on a flour-dusted countertop to roll out immediately, or wrap it in plastic wrap and refrigerate for at least 30 minutes. Refrigeration lessens the chance of the dough cracking when rolling it out. You can also store the wrapped dough ball in the freezer for several weeks.
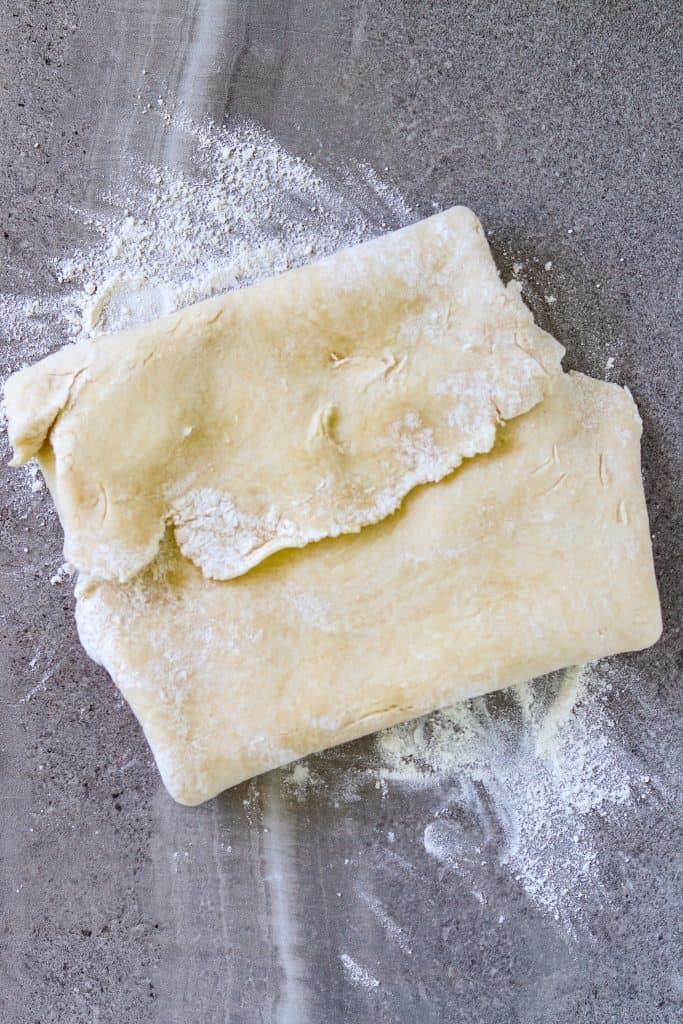
- Sprinkle a thin layer of all-purpose flour on the countertop to prevent the dough from sticking. This is called dusting. Place the dough on the flour and roll it out into a large circle about ⅛-inch thick. Make it large enough to fit into a pie plate; this recipe makes 1 nine-inch pie.
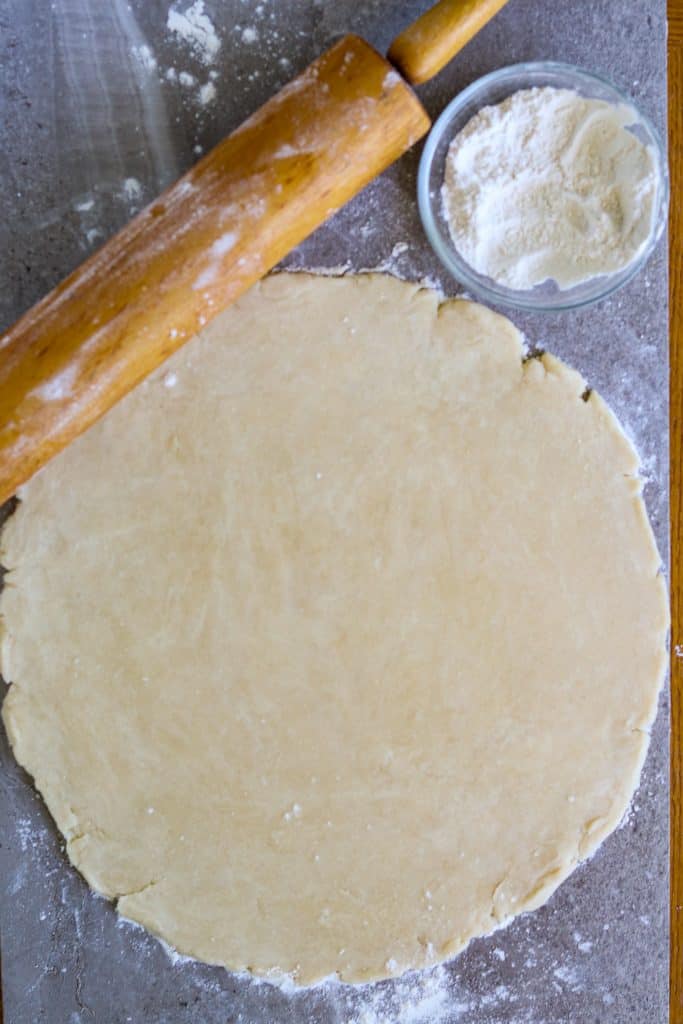
- Fold the dough by one-third towards the center of the crust to form a square.
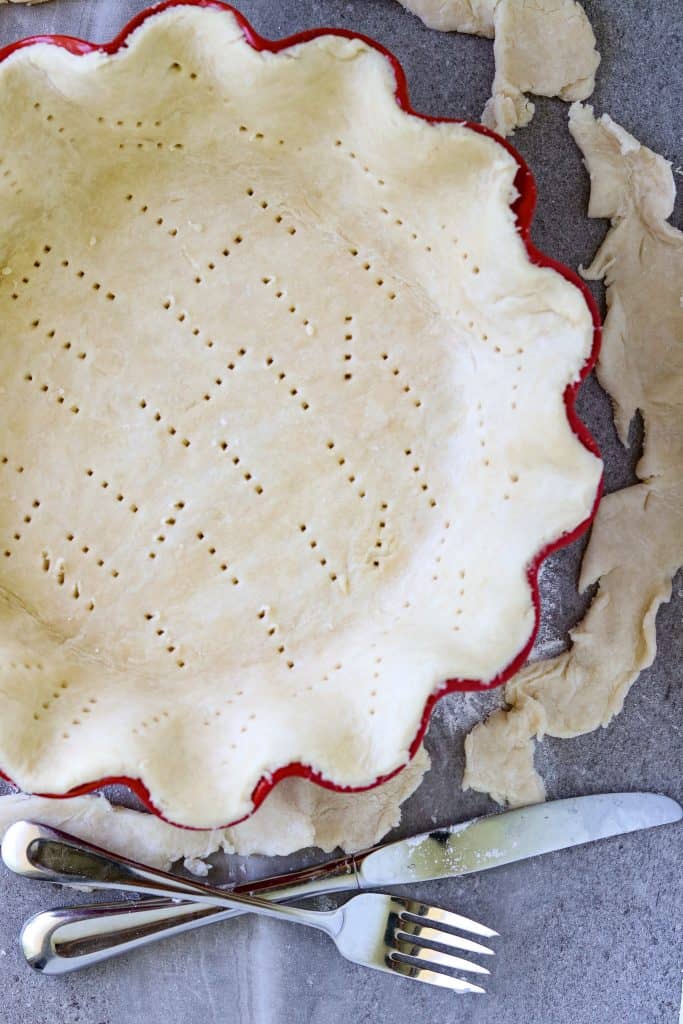
- Place the dough square into the center of the pie plate (9 inches or smaller) and gently unfold to cover the sides of the pie plate; do not pull on the dough. Stretching the dough activates the gluten, which causes shrinkage during baking.
- Trim the dough evenly along the top edge of the pie plate with a knife or kitchen scissors (press the dough against the top edge of the pan with a fork to keep it in place while baking). Or, leave a 1-inch overhang, then fold the crust, tucking under all around the top of the pan. Tucking the edges under gives a thicker crust and helps prevent them from overcooking during baking.
- Prick the crust with a fork, and up the sides, if you are baking the pie crust before filling it.
- Cover the dough with parchment paper, then fill the pie shell with raw rice, dried beans, or pie weights to keep the crust from bubbling and/or shrinking during baking.

- Bake at 450° F for 15 minutes, or use the pie crust for other fill-and-bake pie recipes. Double the recipe for pies topped with crust before baking.
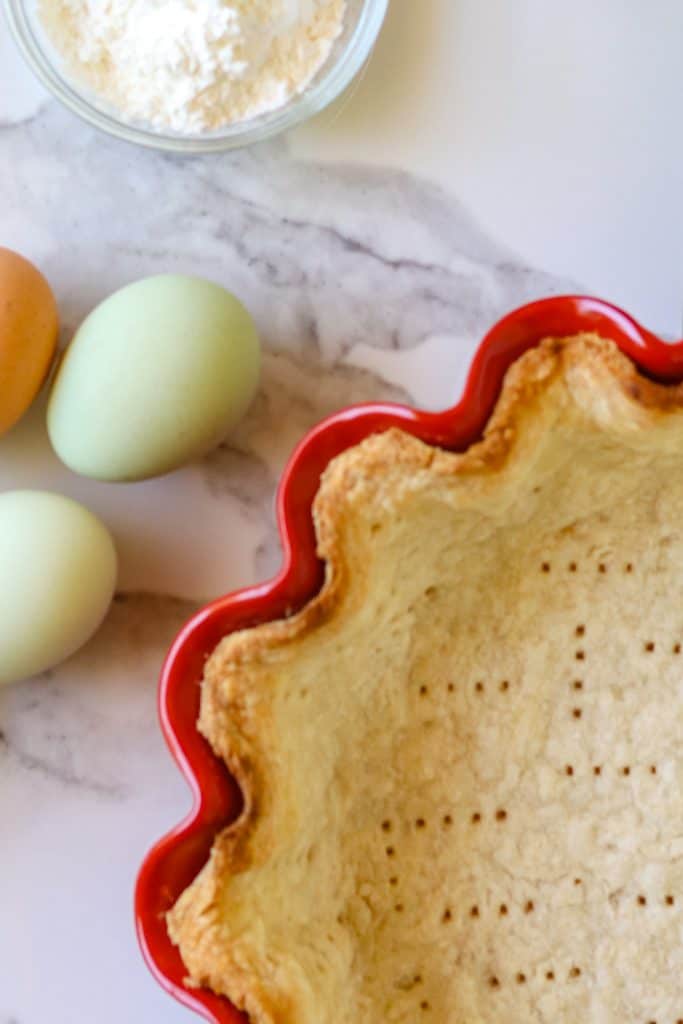
- Store the baked and cooled pie shell in the freezer for up to 1 month after covering with foil and placing it in a zip-top gallon bag.
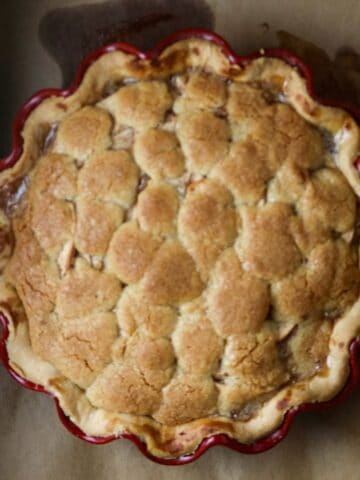
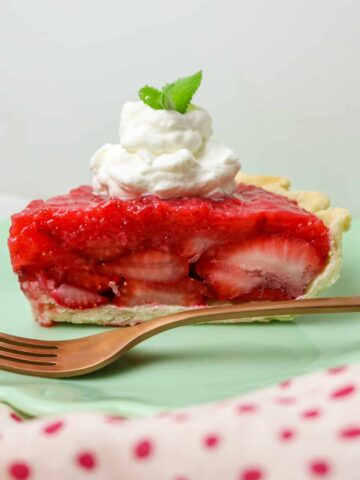
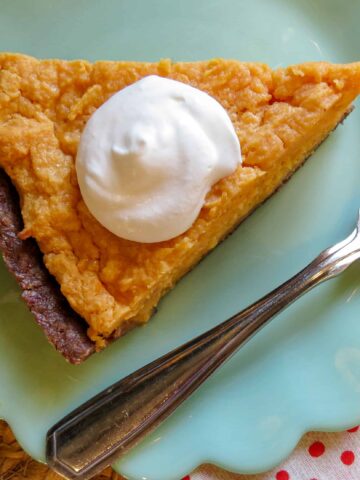
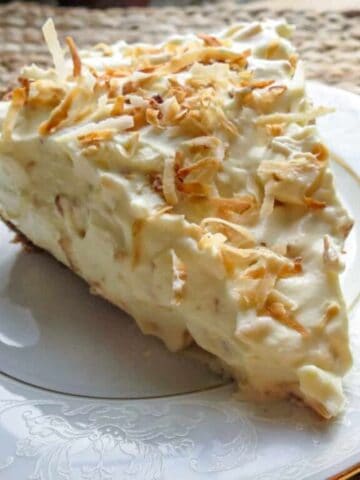
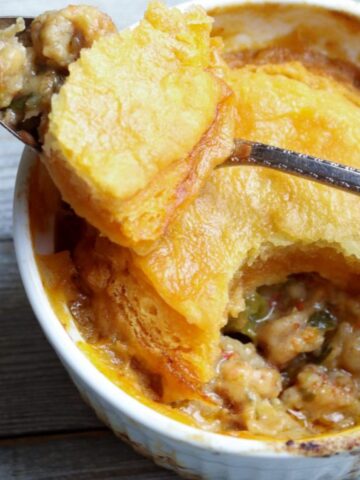
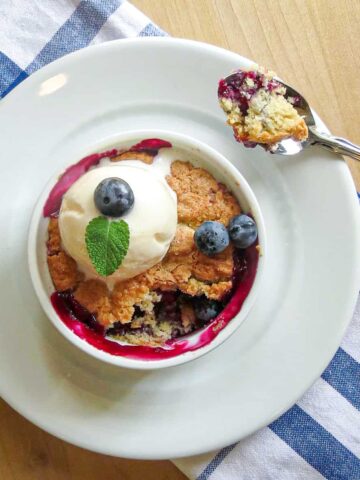
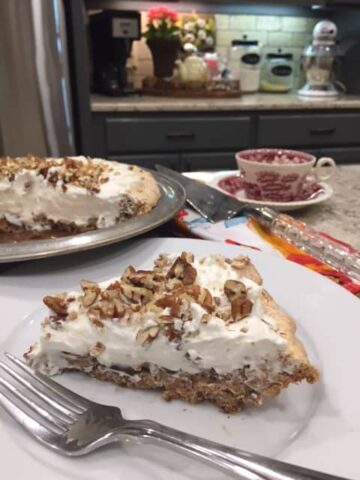
More Pie Recipes For This Crust
Use Classic Homemade Pie Crust for these delicious pies.


For Recipes To Go With Pie

Click over to 50 Best Holiday Recipes, Favorite Traditional Dishes for dish ideas to serve with pie, whether it's for the holidays or not.
Print📖 Recipe
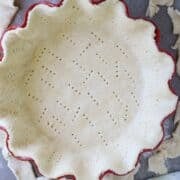
Classic Homemade Pie Crust
- Prep Time: 15 minutes
- Cook Time: 15 minutes
- Total Time: 30 minutes
- Yield: 1 nine-inch pie 1x
- Category: Breads
- Method: Baking
- Cuisine: American
Description
Everything you need to know about making a classic homemade pie crust with simple ingredients and step-by-step instructions for the best results every time.
Ingredients
- 2 cups all-purpose flour, plus more for rolling
- 1 teaspoon salt
- ⅔ cup shortening
- ⅓ cup ice-cold water
Instructions
- Place flour and salt into a large bowl and stir together.
- Cut shortening into the flour using a fork or pastry blender cutter until the mixture forms pea-size balls.
- Stir in small amounts of water with a fork until the dough comes together; you may use more or less than ⅓ cup of water; see notes below.
- Knead the dough a few times, form it into a ball, place it on a flour-dusted countertop, or wrap it in plastic wrap and place it in the refrigerator for at least 30 minutes; refrigerating lessens the chance of the dough cracking when rolled out.
- Roll dough out on a flour-dusted countertop into a circle large enough to cover a nine-inch or smaller pie plate; this recipe makes 1 nine-inch pie.
- Fold in the dough, by one-thirds, toward the center of the crust to form a square.
- Place dough square into the center of the pie plate and gently unfold one side at a time to cover the sides of the pie plate, do not pull on the dough.
- Trim the ends of the dough evenly at the top edge of the pie plate or leave a 1-inch edge overhang to fold crust under all around the plate; see notes below.
- Prick the crust with a fork, even up the sides, if you are baking the pie crust before filling it; see notes below.
- Cover the dough with parchment paper and fill the covered pie shell with raw rice, dried beans, or pie weights to keep the shell from bubbling and/or shrinking during baking.
- Bake at 450° F for 15 minutes, or use the pie crust for other fill and bake pie recipes.
- Store baked and cooled pie shell in the freezer for up to 1 month after covering with foil and placing in a zip-top gallon bag.


Notes
- Sometimes the dough needs more water if the shortening isn't cut enough into the flour.
- Too much water makes a gummy pie crust.
- Too much flour causes the dough to toughen.
- When covering pie pate, do not pull on the dough to wrap the sides of the pan, or the crust will shrink during baking.
- You can use a fork to crimp the top edges of the dough onto the pie plate or leave enough crust to turn it under and flute the edges with your fingers for a classic design; this keeps the edges from shrinking and sliding into the pie plate while it bakes.
- Prick the uncooked pie crust only when filling it after baking.
- Do not prick the unbaked crust if you are filling it before baking, or the filling will leak out during baking and leave a soggy crust.
- Double the recipe for pies topped with crust before baking.

Be sure to sign up for my emails to keep in touch. If you have any questions or comments, please leave them in the reply box below.
Go ahead. You know I love hearing from you!
Have a nice day!
A man who wants to lead the orchestra must turn his back on the crowd.
Max Lucado
Comments
No Comments